This page in: English - Deutsch - Español - Français - Italiano - Lietuvių - Nederlands - Norsk - Polski - Русский - Svenska - Tiếng Việt - عربي - 日本語 简体中文
Add/Edit Content
Contents |

- Now let's add some content to your site. Assuming that you already have logged in to the Admin Console, navigate to "Content/Pages". At the bottom left of the screen, click on "Add New Content". This will take you to the screen where you choose the settings for the page that you will create and type its content. There are three tabs available "Main", "Options" and "Preview".
 Add/Edit New Content (CMSms 1.5.2 "Caguas")
Main Tab
- Type - Start by selecting the content type of the page. For a normal page you just use the default, which is "Content".
- Content -- The content type is simply a regular page. That is what this page you are reading is. Here you can put any content that you would put on a regular page. The layout of these types of pages are controlled by the templates. For each content page you create you must choose a template for it. If you login as admin and change the template of this page, you will see exactly how it works.
- External Link -- The External link type is just what it sounds like, a link to another external page. This External Link type also shows up in the menu following the same hierarchy rules as the content type.
- Internal page Link -- The Internal Page link type is just what it sounds like, a link to another Internal Page. This Internal Page Link type also shows up in the menu following the same hierarchy rules as the content type.
- Section Header -- The section header type is used to break up menus into groupings. This is unrelated to the hierarchy, as the section headers have no associated pages with them. They are just a little bit of text to say what the next few links are in reference to.
- Separator -- The separator type is just what it sounds like, a separator that appears on the menus. This type follows the hierarchy set in content management pages.
- There may be more types available, depending on the modules you installed, e.g. the Guestbook type if you installed the guestbook module.
- Title: Then you select the title for the page.
- Menu Text: Next select the text that will appear in the menu. The menu text can either be the same as or different from the title.
- Parent: If the page you are adding is supposed to be a child to another page, then you select the parent page among the existing pages.
- Image: and Thumbnail: MenuManager can use them directly as $node->image and $node->thumbnail> (you'll have to prepend the path to that) i.e: <img src="{$gCms->config['image_uploads_path']}{$node->thumbnail}"/> In your page content try: {$content_obj->GetPropertyValue('image')} or {$content_obj->GetPropertyValue('thumbnail')}. [Details]
- Template: Then select what template to use for this particular page.
- And lastly, add the actual content of the page. For this you can either use a so-called WYSIWYG (What You See Is What You Get) editor or type the HTML code directly. This can be set in the "My Preferences/User Preferences".
- Finally click one of the buttons at the bottom
- Submit -- to submit the changes and return to "Content/Pages".
- Cancel -- to return to "Content/Pages" without applying any of the changes you have made.
- Apply -- The Apply button will only appear when you update the contents, not when you "Add New Content". To apply the changes you made, but still stay in the editing window press this button.
- Preview -- (the file icon with the magnifier) to preview the page without saving or leaving the editing window. It opens a new browser window or tab. See section "Preview Tab" below for an alternative.
- Type - Start by selecting the content type of the page. For a normal page you just use the default, which is "Content".
Options Tab
 Page Options (CMSms 1.5.2 "Caguas")
- Active: When a page is active it is available at the frontend of the site. When it is not active it is not available but does exist in the database. This way you can temporary disable a page or activate it when it is finished.
- Show in Menu: This way you can make an active page appear in the menu at the frontend of the site. If this option is not checked the page is still available (e.g. through a direct link) but will not appear in the Menu.
- Cacheable: If you enable caching, the underlying template engine will keep a copy of your page around (on the server), so that it can render the page more quickly. If you disable caching, each request will cause the page to be assembled from its constituent parts (template, content, etc). You need to disable cache if the page has any Front End User or Custom Content tags in it. Some galleries require that the pages are not cached.
- Target: This is one of
- none - Open the page in the same window/tab (default)
- _blank - Open the page in a new window/tab
- _self - as 'none'
- _parent - Open in the parent frame above the current frame (framesets only)
- _top - Open in the very top of nested frames (framesets only)
- If you do not have nested frames _parent and _top act the same.
- Note: Not all default menu templates support the target feature! The 'accessible-ones' do!
- Page Alias: This is used to generate the URL for the page.
- Page Specific Metadata: This field is just a big block of code that gets put in between the <HEAD> </HEAD> tags in your page (it requires the code {metadata} in your template!), so as the name suggests this is a good spot for metatags but, you can also put smarty tags in here or even javascript that is particular to this page. Note if you are putting in javascript you should surround it with the {literal} {/literal} tags ==> To add Metadata, surround with tags, for example: <META NAME="description" CONTENT="Type a description of your website in here - this will appear in search engine results"> -- and -- <META NAME="Keywords" CONTENT="Type a list of keywords in here, separated by commas."> Also read [Global settings]
- Description (Title Attribute): A short description of the page - to see this Metadata TITLE appear, you need to insert the {description} tag in your template
- Tab Index: The order the cursor will move when pressing the Tab key. If you've laid out your page as it is meant to be tabbed through leave this field blank.
- Access Key: Access keys are assigned letters to a frequently used link or form element [Details].
- This page is searchable: Make a page searchable for the Search Module or not. Uncheck it and the search module will ignore this page.
- Smarty data or logic that is specific to this page: If you have smarty logic in this field you can use it with a new plugin {process_pagedata} which processes the page specific data through smarty. It should be at the very top of all page templates [Details].
- Extra Page Attribute 1 - 3: You can use the content of this field in your template [Details].
- Owner: Who owns this page and can dictate editors.
- Additional Editors: Who can edit this page (see also: Group Permissions).
Preview Tab
- This does nearly the same as the "Preview" button/icon in the bottom button bar (Section "Main Tab"). It shows a preview of your page in a small frame without "applying" or "submitting". This is useful if you want to check your changes or your new page (as it appears in a real browser) before you publish it. You can easily switch back to the Main Tab to alter your content if you are not satisfied with the result. In comparison to the former function no new browser window/tab will be opened. You may need to click the "Preview"-tab twice to update the view.
 Preview (CMSms 1.5.2 "Caguas")
Page List View
Go to "Content/Pages".
 Pages (CMSms 1.5.2 "Caguas")
Edit a Page
- When you are in "Content/Pages" in 'edit' mode (by clicking "Edit"
 or click an existing link of a page), you will see three tabs, above the first typing field. The 3 tabs are the same as described above.
 The three Tabs
- To edit a page of Content, an External Link, an Internal Page Link, a Section Header or Separator, do like this:
- Navigate to "Content/Pages" in the Admin Console.
- Click on the Page link of a page of Content, an External Link, an Internal Page Link, a Section Header or Separator (you can also click on the edit symbol at the right on each line
 ).
).
- Edit as you wish.
- Click Submit (which will save and redirect you to "Content/Pages") or Apply (which simply saves the changes without redirecting). If you click Preview you get to see how the changes will look, but it is only when you click Submit or Apply that the changes are saved.
Activate a Page
- You can "Inactivate" or hide a page to visitors of your site, while still keeping the page "in the system" so that you can publish it later.
- All pages with this symbol (
 ) in the Active column are active and thus shown to visitors of your site. To "Inactivate" a page, simply click on in the Active column for the page that you'd like to "Inactivate" and the symbol will change to
  and vice versa.
- Sometimes you want a page to be "Active" or accessible, but not show up in the menu (e.g. this may happen when you only want to give someone a direct link to a page). Then click on the page that you would like to hide in the menu. Select the "Options" tab and untick "Show in Menu" and vice versa.
Reorder Pages
- You can change the order that the pages are shown in the menu.
- To move a page one step upwards in the page hierarchy, click on
 in the Move column for the page that you'd like to move. Similarly, to move a page one step downwards in the page hierarchy, click on
  in the Move column for the page that you'd like to move.
- Note: You can only move a page one step at a time. All pages that are children to a parent page are shown under that parent page and can not be moved this way to another parent. If you want to move a page to another parent use "Edit Content" and change the "Parent" to your wishes.
- Note: Newer versions have a link at the top and bottom to Reorder Pages where you can drag and drop the pages, but you can't move them in or out from under the parent pages (so, only the toplevel can be dragged/dropped).
Set Default Page
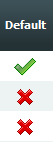
- The default page is the page that is shown when the visitor enters your site. It has the same role as the index.htm file in traditional web-page making. Naturally, only one page can be set as the default page.
- To select a page to be the default page, click in the Default column for that page. You will then have to click OK in the popup dialog.
- The default page is the page with the icon in the Default column. All other pages have the icon .
Copy Page
- To copy an existing page click on the appropriate copy-icon
 of the page you want to copy. You need to fill out the fields Page Alias:, Title:, Menu Text:, Parent: and Access Key:. Description see above.
Delete Page
- Deleting a page is easy. Simply click on the delete symbol,
 , to the far right of the row for the page that you'd like to delete. In the popup dialog, click OK and the page is forever gone.
- Note: You cannot delete a page that has children pages. Then you first need to delete all the children pages, or make them have another parent page. Also, you cannot delete the page that is the default page, until you choose another page to be the default page.
- Note: You can Delete/Inactivate/Activate multiple pages in one time. Select the pages and select the appropriate action from the "With Selected" dropdown list. For details see section "Bulk Actions" below.
Bulk Actions
 Bulk Actions "With Selected" (CMSms 1.5.2 "Caguas")
- To alter the status of multiple pages the bulk action function "With Selected" can save a lot of time. First you have to select the pages in question by checking their checkboxes (marked light red in the image above). When you mark the upper checkbox in the table header all pages will be selected with one click.
- Following one-click bulk actions are available:
- Delete: Delete all marked pages. Use this function with care.
- Active: Activate all marked pages if they are deactivated otherwise nothing will happened.
- Inactive: Deactivate all marked pages if they are activated otherwise nothing will happened.
- Cachable: Make all marked pages cachable for higher performance.
- Non Cachable: Make all marked pages non-cachable. This make sense when you use the CustomContent module and when you have Smarty logic in your template/page. See module help for details.
- Show in Menu: To display the menu titles of the selected pages in your menu.
- Hide from Menu: Remove the menu title of the selected pages from the menu.
- Set Template: You can choose a template and assign it to all selected pages.
Meta tags required
- Metadata or meta tags are required by search engines so they know how to display a website's information in the search results. Look at this snapshot, and notice the different Title Descriptions [bold text] and different Metadata Descriptions [META NAME="description"]:

- Notice the CMSMS tag {description} is the blue linked heading which appears at the start of each website search result.
- The metadata description is the actual sentence or paragraph which gives a mini blurb about that particular page.
So ...?
- So if you add text in the CONTENT | PAGE | OPTIONS tab, in the Description field like this:
- then you will need to add the tag {description} to your templates, as well as the tag {metadata}
- I hope this helps to clarify! :)
This page in:
English -
Deutsch -
Español -
Français -
Italiano -
Lietuvių -
Nederlands -
Norsk -
Polski -
Česky -
Русский -
Svenska -
Tiếng Việt -
عربي -
日本語
简体中文
